ISO is a critical camera setting, but it is NOT part of exposure. Here’s why.
The ISO of our camera is one of the three pillars of photography (the other two being shutter speed and aperture), and it has a significant impact on the quality of our photographs. What is ISO, and how does it effect the quality of your photos? In this tutorial, we'll cover the basics of ISO and show you how to utilize it properly to get the greatest results.
What is ISO?
ISO is a camera setting that brightens or darkens a photo in the most basic sense. Your images will get increasingly brighter as you increase the ISO setting. As a result, ISO can assist you in capturing photographs in low-light situations or allowing you to be more flexible with your aperture and shutter speed settings.
However, increasing your ISO has drawbacks. A photograph taken with a high ISO will have a lot of grain, also known as noise, and may be unusable. As a result, increasing the ISO to brighten a photo is always a trade-off. Only increase the ISO if you are unable to brighten the image using the shutter speed or aperture (for example, if using a longer shutter speed would cause your subject to be blurry).
“Some cameras have ISO “HI” and “LO” settings that may extend beyond the camera's native range. These, on the other hand, are fully synthetic and degrade your visual quality. We advise you to stay away from them.”
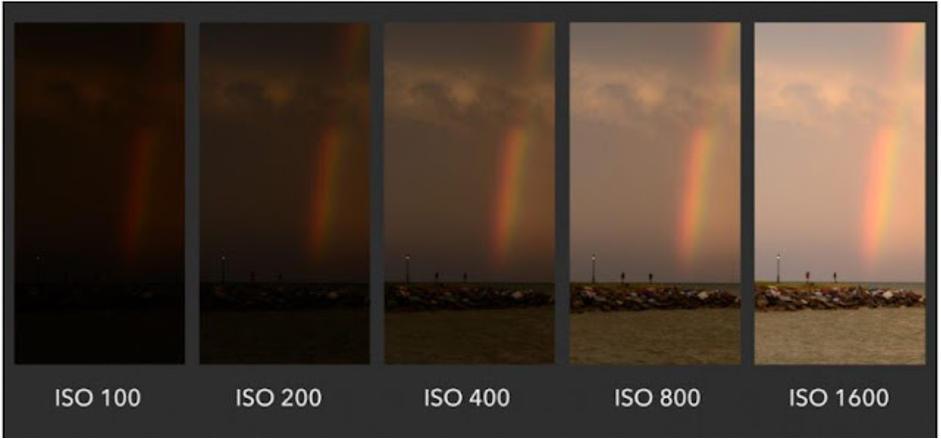
Note how much brighter the image gets when ISO is increased from 100 to 1600
What is the Meaning of ISO?
The ISO (International Organization for Standardization) acronym stands for "International Organization for Standardization." Camera ISO, on the other hand, does not refer to the organization that develops numerous technical and product standards. Since 1974, when two film standards, ASA and DIN, were unified into ISO standards (later amended for both film and digital photography), they have been referred to as "ISO." Although ISO was originally designed to describe solely film sensitivity, it was eventually adopted by digital camera manufacturers in order to retain film-like brightness levels.
Common ISO Values
Every camera has a different range of ISO values (sometimes called ISO speeds) that you can use. A common set is as follows:
ISO 100 (low ISO)
ISO 200
ISO 400
ISO 800
ISO 1600
ISO 3200
ISO 6400 (high ISO)
Quite simply, when you double your ISO speed, you are doubling the brightness of the photo. So, a photo at ISO 400 will be twice brighter than ISO 200, which will be twice brighter than ISO 100.
What is Base ISO?
Your “base ISO” is the lowest native ISO on your camera. This is a crucial setting since it allows you to achieve the best image quality while reducing the visibility of noise as much as possible. Most modern digital cameras have a base ISO of 100, however some older DSLRs and several modern cameras, such as the Fuji X-T2, have a base ISO of 200. To get the best image quality, you should always try to stick to the base ISO. However, this is not always practicable, particularly when working in low-light situations.
Low vs High ISO Noise Visibility
To give an example of two photos taken at different ISO values, look at the comparison below. Pay attention to the level of noise (graininess and blotchy colors) in the images:
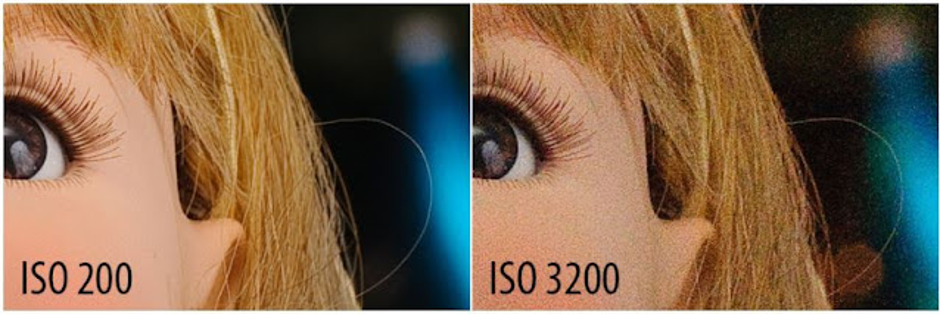
The difference is clear – the image at ISO 3200 has much more noise than the one at ISO 200 (which I brightened with a long shutter speed instead). Therefore, you should avoid high ISOs whenever possible, unless conditions require you to use them.
How to Change ISO
Changing ISO varies from camera to camera. Here are some common ways to change ISO:
To begin, select a mode that allows you to choose your own ISO. Change to Manual, Shutter Priority, Aperture Priority, or Program from Auto (we tend to prefer Aperture Priority or Manual).
You'll probably need to open a menu (perhaps the "fast menu") and find the ISO section for entry-level DSLRs and mirrorless cameras. Select the desired value or leave it at Auto.
There may be a dedicated "ISO" button on the camera for higher-end cameras. To adjust your ISO setting, press it while spinning one of the wheels. Even if your camera doesn't have an ISO button, it's possible that you can program one to perform this function.
Other cameras may have a specialized ISO wheel with several ISO settings already marked. This simplifies things even more. If you're still unsure, see your camera's handbook. However, knowing how to quickly alter your ISO level is important, as you'll likely be doing it frequently, especially if you're shooting in low-light situations without a tripod or flash.
What ISO Should You Use?
Many photographers are familiar with the fundamentals of ISO, but are unsure which ISO setting to use in the field. In practice, there's a reason your camera has so many ISO options: different scenarios necessitate different ISOs. We'll go over some of the most common circumstances you'll encounter below.
When to Use Low ISO:
As previously said, you should always strive to use your camera's lowest ISO (base ISO), which is often ISO 100 or 200, whenever possible. If there is sufficient light, you can use a low ISO to reduce the appearance of noise as much as possible.
You might be able to use a low ISO even in dim or gloomy conditions. If your camera is mounted on a tripod or is totally steady on a table, for example. Because you won't add camera shake, you can safely utilize a low ISO and brighten your photo with a lengthy shutter speed instead. However, take in mind that anything moving will appear as a ghost if your camera has a lengthy shutter speed.
When to Use High ISO
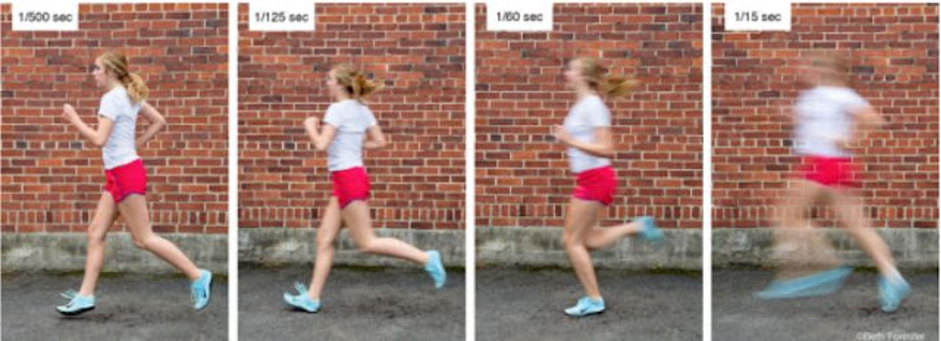
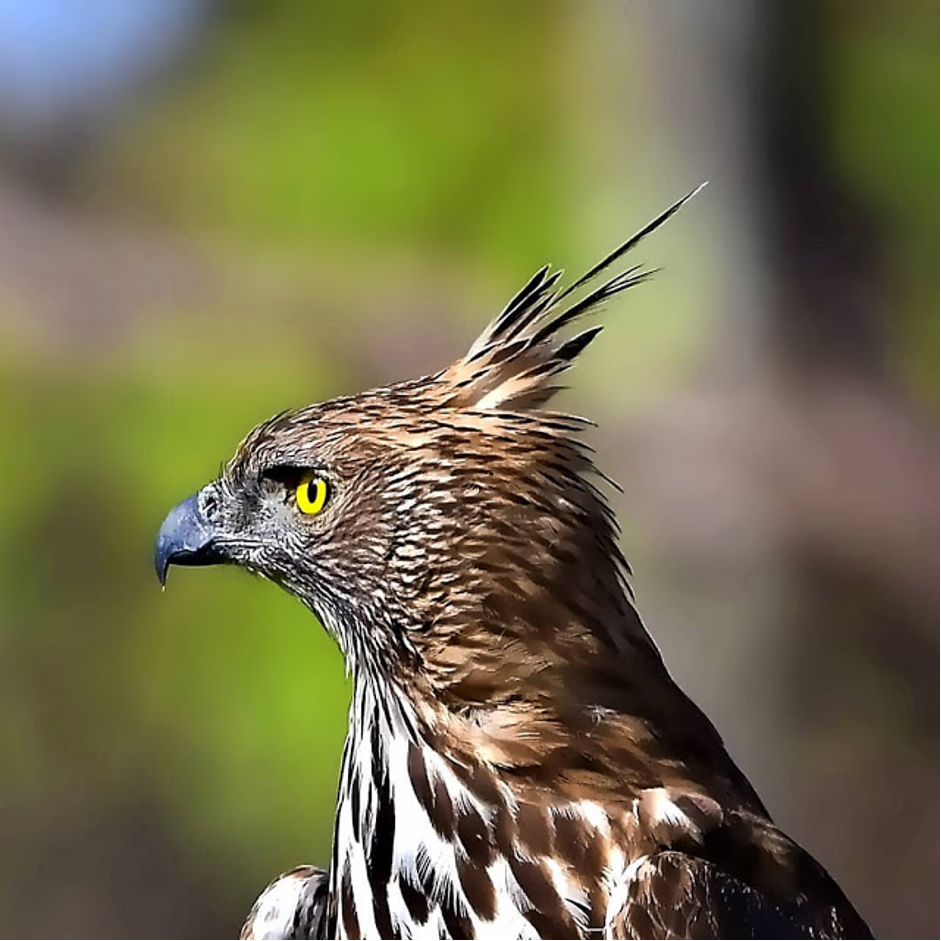
Even while using low ISOs is preferable, there will be occasions when a high ISO is required to shoot a good photo in the first place. The basic reason for this is that you will frequently be fighting motion blur, and you will have to choose between a sharp photo at a high ISO and a fuzzy photo at a low ISO. Take a look at the illustration below:
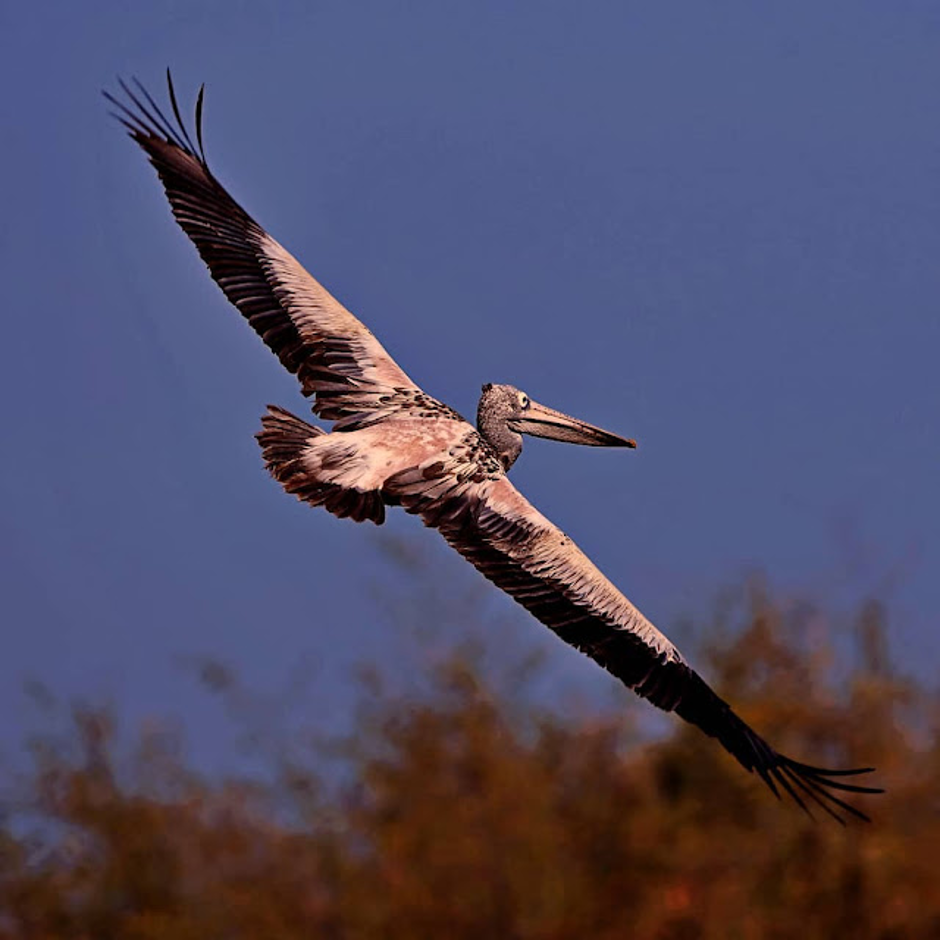
At 1/2000th of a second and ISO 800, this bird was captured. My camera needed 1/2000th of a second to completely freeze the birds in mid-flight. What would have occurred if I had instead set my camera's ISO to 100? To get a bright photo, I would have needed a shutter speed of 1/250th of a second. Because the birds were moving so quickly, there would have been a lot of undesired motion blur in the photo at that level. To put it another way, I would have damaged the image.
The bottom line is that you should increase the ISO when there is not enough light for the camera to capture a sharp, bright photo any other way. When I shoot handheld photos indoors without a flash, I always set my ISO to a higher number to capture the moment without introducing blur. Or, when photographing ultra-fast action like in the bird picture above, raising your ISO is often necessary.
On most cameras, there is a setting for Auto ISO, which works great in low-light environments. The beauty of this setting is that you input the maximum ISO you are willing to use, so that the camera does not cross that limit. Personally, if I want to limit the amount of noise in a photo, I will set my maximum ISO to something like ISO 800, 1600, or 3200. The downside is that the camera will start using progressively longer shutter speeds if it reaches these ISO limits, which leads to more motion blur. Everything is a trade-off!
Minimizing Noise and Maximizing Image Quality
Some photographers believe that using Base ISO 100 percent of the time is the best method to obtain high-quality photographs. However, as seen above, this is simply not the case. You may find yourself in situations when you have no choice but to use a higher ISO.
When there is adequate light, you should merely utilize base ISO. In a dark atmosphere, don't try to force ISO 100, as your images will be far too dark. Similarly, capturing activity with a quick shutter speed is practically the same as taking images in a dark setting (since you strictly limit the amount of time your camera sensor can capture light). As a result, a high ISO may be your only option for certain sorts of sports and action photography.
To maximize your image quality, here are the four steps you need to follow:
Select the aperture setting that will provide your desired depth of field.
Set your ISO to its base value, and put your shutter speed to whatever setting provides a proper exposure.
If your subject is blurry, progressively raise your ISO and use a faster shutter speed until motion blur disappears.
If your ISO is getting too high and you still have the ability to use a wider aperture, open it up until the ISO gets to a more manageable level, even if it means sacrificing some of your desired depth of field.
That’s all it takes! If you follow these steps, you’ll capture the maximum image quality each time. You’ll find the ideal balance between noise, motion blur, and depth of field.
Common ISO Myths and Misconceptions
ISO has a lot of myths surrounding it, including some that are quite common to hear. In this section, we will quickly address some of those concerns so that you are not misled about this topic in the future.
Is ISO “Sensor Sensitivity”?
This is the most common misconception about ISO. It's something you'll notice all across the internet (and in print). However, while thinking of ISO as “acting like” camera sensor sensitivity may be helpful, this is not the case. Digital sensors, on the other hand, have only one sensitivity, independent of ISO. ISO, on the other hand, is more accurately described as a mapping that tells your camera how bright the output photo should be given an input exposure.
Is ISO Part of Exposure?
ISO is not a factor in exposure. By physically collecting more light, shutter speed and aperture brighten your shot. ISO doesn't do that; instead, it brightens the image you've previously taken. As a result, photographers do not consider it to be part of exposure.
Is Raising ISO Just Like Brightening Your Photo on a Computer?
This is a clever question, but it is, once again, based on a misunderstanding. Brightening a photo on your computer can have a variety of effects, including as increasing the ISO, which makes noise more noticeable (and it leads to a brighter image). However, the fundamental difference is that increasing the ISO on your camera almost always results in greater image quality than lightening a shot on your computer. To put it another way, it's better to utilize ISO 800 when necessary rather than over-brightening an ISO 100 shot in software like Lightroom!
How Does ISO Affect a Photo?
ISO impacts both grain / noise levels and dynamic range, as well as increasing or decreasing the brightness of a shot. Your photographs will have the least amount of noise and the best dynamic range at the lowest (base) ISO level, providing you the most post-processing freedom. Noise levels rise as ISO rises, and dynamic range often reduces as well.
What is the Best ISO Setting for Low-Light?
In low-light situations, your shutter speed will usually slow down, resulting in camera shake or motion blur. Increase the ISO setting to a higher value, such as ISO 1600, to avoid similar problems. You may need to boost ISO even further depending on your aperture and lighting conditions.
What is the Best ISO Setting for Landscape Photography?
When photographing landscapes, you should use a tripod and set your ISO to your camera’s base ISO, which is typically 100.